
Learning to melt chocolate chips is all about precision and skill. Both professional bakers and home cooks know that the right melting method can make a big difference. It’s key for making delicious desserts like ganache or delicate sweets.
There are a few ways to melt chocolate chips, like using the microwave or a double boiler. Each method has its own benefits, but they all need careful attention to avoid mistakes. Chocolate is very sensitive to heat, so it’s important to handle it gently to get a smooth finish.
Key Takeaways
- Multiple techniques exist for melting chocolate chips
- Temperature control is crucial for successful melting
- Avoid introducing water during the melting process
- Use low, consistent heat for best results
- Different chocolate types require specific melting approaches
- Stirring frequently prevents chocolate from burning
Understanding the Basics of Chocolate Melting
Melting chocolate is an art that needs precision and careful attention. It involves knowing different chocolate types and their melting characteristics. It also means being ready for challenges during preparation.
There are many chocolate types for melting, each with its own melting process. Choosing the right chocolate is key for making great dishes.
Chocolate Varieties for Melting
- Semi-sweet chocolate chips: Slower melting rate, requires extra attention
- Dark chocolate: Melts best between 110°F and 120°F
- Milk chocolate: Ideal melting temperature between 104°F and 115°F
- Couverture chocolate: Contains 32% cocoa butter for smooth melting
Temperature Considerations
The melting temperature is crucial to avoid chocolate seizing or burning. The best temperature range for most chocolates is between 104°F and 113°F.
“Precision is key when melting chocolate – a few degrees can make all the difference.”
Common Chocolate Melting Challenges
Chocolate melting challenges can be frustrating for even skilled home cooks. Some common problems include:
- Chocolate becoming clay-like
- Uneven melting leading to a rough texture
- Scorching or burning from too high heat
- Contamination from water or dirty utensils
Pro tip: Always use clean, dry utensils and keep an eye on the temperature to avoid these common issues.
Essential Tools and Equipment Needed
Choosing the right tools for melting chocolate is key to perfect results. Both professional bakers and home cooks know that good equipment is essential. It helps create smooth, glossy chocolate.
Here are the essential tools you’ll need for successful chocolate melting:
- Microwave-safe glass bowls
- Double boiler or heat-safe glass bowl with saucepan
- Silicone spatulas
- Digital food thermometer
- Heat-resistant rubber scraper
When picking tools for melting chocolate, keep these points in mind:
| Tool | Key Purpose | Recommended Material |
|---|---|---|
| Mixing Bowl | Melting and mixing chocolate | Glass or stainless steel |
| Spatula | Stirring and scraping | Silicone (heat-resistant) |
| Thermometer | Temperature monitoring | Digital with precise readings |
Pro tip: Avoid using wooden utensils, as they can retain moisture and potentially ruin your chocolate’s texture.
“The right tools transform chocolate melting from a challenge to an art form.” – Professional Chocolatier
Experts say investing in top-notch chocolate melting tools is worth it. They ensure even heat and precise temperature control. Specialized equipment, like professional chocolate melters, can take your chocolate making to the next level. This way, you get smooth, perfectly tempered chocolate every time.
The Microwave Method: Quick and Convenient
Melting chocolate in the microwave is fast and easy if you know how. Both pros and home cooks love it for being quick and simple. The trick is to use the right methods and watch closely.
Getting smooth, melted chocolate without burning it is key. The right tools and following certain steps can greatly improve your results.
Step-by-Step Microwave Instructions
- Choose a microwave-safe bowl, like glass or ceramic
- Chop chocolate into small pieces for even heating
- Put the chocolate in the bowl
- Set the microwave to medium power (50%)
Power Settings and Timing
Controlling the temperature is vital when melting chocolate. Here are some tips to avoid overheating:
| Chocolate Type | Power Setting | Interval Duration |
|---|---|---|
| Milk Chocolate | 50% | 30 seconds |
| Dark Chocolate | 50% | 30 seconds |
| White Chocolate | 40% | 20 seconds |
Stirring Techniques
Stirring is crucial when melting chocolate in the microwave. To ensure the heat is spread evenly and to prevent burning, it’s important to stir often. Experts recommend giving it a stir every 20-30 seconds.
“The secret to perfect melted chocolate is patience and constant attention.” – Professional Pastry Chef
Chocolate may look solid even when melted, so stirring is key. By following these tips, you’ll get smooth, glossy chocolate for any recipe.
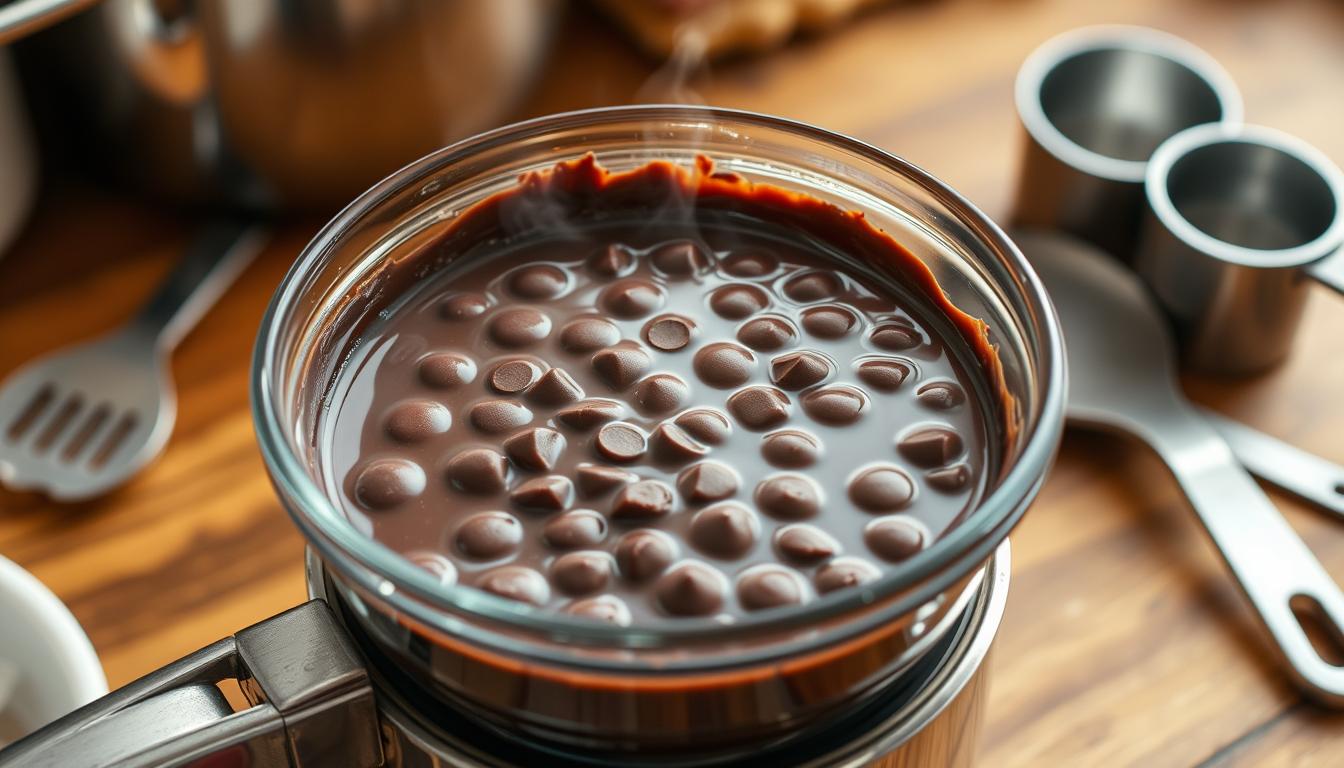
Double Boiler Method: Traditional Approach
The double boiler method is a traditional way to melt chocolate. It’s gentle and precise, turning chocolate chips into a smooth, glossy mix. This method avoids scorching by using indirect heat, making it popular among chefs and bakers.
To melt chocolate in a double boiler, you need the right setup and technique. It’s important to keep the water temperature right and make sure no moisture touches the chocolate. Bakers suggest keeping the water level ½-inch below the upper pan to avoid water splashing.
“Patience is the secret ingredient in perfect chocolate melting” – Culinary Expert
- Use a clean, dry double boiler setup
- Chop chocolate into uniform pieces for even melting
- Stir constantly to prevent hot spots
- Maintain low, consistent heat
Here are the key steps for melting chocolate the traditional way:
- Fill bottom pot with about one inch of water
- Heat the water to a gentle simmer
- Put the top pan with chocolate chips above the water
- Stir the chocolate constantly until it’s smooth
Professional bakers suggest adding a teaspoon of refined coconut oil to adjust the chocolate’s consistency and prevent seizing.
| Chocolate Type | Melting Characteristics | Recommended Technique |
|---|---|---|
| Dark Chocolate | Slower melting rate | Lower heat, more patient stirring |
| Milk Chocolate | Medium melting rate | Moderate heat, frequent stirring |
| White Chocolate | Fastest melting rate | Lowest heat, quickest attention |
Success in double boiler chocolate melting comes from careful attention and gentle handling. This ensures a silky texture every time.
How to Melt Chocolate Chips Without Special Equipment
Melting chocolate at home is simpler than you might think. You only need basic kitchen tools. The trick is to control the temperature and use careful techniques for smooth chocolate.
Without a double boiler or professional melter, you have other options. Experienced cooks find creative solutions in the kitchen. Chocolate chips are great for melting because they melt quickly and are uniform in size.
Direct Heat Method: Stovetop Technique
The direct heat method needs careful attention to avoid burning. Here’s how to melt chocolate successfully:
- Use a heavy-bottomed saucepan
- Set heat to the lowest possible setting
- Stir chocolate constantly
- Remove from heat when mostly melted
Alternative Tools and Techniques
If you don’t have a stovetop, there are other ways to melt chocolate:
- Oven Method: Place chocolate in an oven-safe bowl at very low temperature (around 100°F)
- Sunny Window Technique: Use indirect sunlight to gently warm chocolate
- Hot Water Bath: Carefully place chocolate in a heat-safe bowl over warm water
Pro Tip: Always keep moisture away from melting chocolate to prevent seizing.
Remember, melting chocolate without equipment takes patience and gentle heat. The best temperatures for smooth chocolate are between 104°F and 113°F.
Preventing Common Melting Mistakes

Melting chocolate chips can be tricky, even for experienced bakers. It’s important to know how to avoid common mistakes. This ensures your chocolate turns out smooth and glossy every time.
Several challenges can mess up your chocolate melting. These mistakes usually come from three main problems:
- Overheating the chocolate
- Introducing moisture
- Using improper utensils
Keeping the temperature right is key to avoiding mistakes. Different chocolates need different temperatures:
| Chocolate Type | Ideal Melting Temperature | Risk of Failure |
|---|---|---|
| Dark Chocolate | 115°F | Low |
| Milk Chocolate | 108°F | Medium |
| White Chocolate | 104°F | High |
To avoid mistakes, pay close attention. One drop of water can ruin your chocolate, making it grainy and seized. Make sure your tools are dry and use gentle, steady heat.
“Precision is the key to perfect chocolate melting” – Professional Pastry Chef
Pro tip: When melting chocolate, use a 2:1 ratio. Start with two-thirds of the chocolate, then add the rest. This keeps the texture right and avoids melting errors.
Adding Oils and Fats for Smooth Results
Turning chocolate into a silky texture needs some smart tricks. Adding oil to melted chocolate can change the game for both home bakers and pros.
Chocolate and coconut oil make a great team for melting. The right fat can make the chocolate smoother, stop it from seizing, and boost its quality.
Coconut Oil Benefits
Refined coconut oil has many perks for chocolate:
- Provides smooth, glossy finish
- Helps prevent chocolate from becoming grainy
- Lowers melting point for easier handling
- Adds subtle flavor enhancement
Proper Oil-to-Chocolate Ratios
Getting the right chocolate consistency needs exact measurements. Here’s a guide to help:
| Chocolate Amount | Coconut Oil Quantity | Best Use |
|---|---|---|
| 1 cup chocolate chips | 1.5 teaspoons coconut oil | Dipping and coating |
| ½ cup chocolate chips | 2 teaspoons vegetable oil | Drizzling and glazing |
“The secret to perfect melted chocolate is balance and patience.” – Professional Pastry Chef
Pro tip: Always add oil slowly and stir well to keep the texture smooth when adding oil to melted chocolate.
Signs of Properly Melted Chocolate
To get chocolate just right, you need to watch for certain signs. Chocolatiers know that spotting these signs is key to making chocolate smooth and shiny.
Here are the main signs of perfectly melted chocolate:
- Smooth, uniform texture without any lumps
- Glossy and reflective surface
- Fluid consistency that flows easily
- Consistent color throughout
“The secret to perfectly melted chocolate is patience and precision.” – Pastry Chef Marcus Reynolds
Temperature is very important when melting chocolate. Couverture chocolate, with at least 32% cocoa butter, is the best for melting. The right temperature depends on the chocolate type:
| Chocolate Type | Ideal Melting Temperature |
|---|---|
| Dark Chocolate | 110-120°F |
| Milk Chocolate | 104-115°F |
| White Chocolate | 104-115°F |
Experts use gentle heat and keep a close eye on the chocolate. Look for these signs to get perfect chocolate every time.
Troubleshooting Seized Chocolate
Chocolate seizing is a common problem for home bakers and chocolate lovers. Knowing the science behind it helps find solutions and improve melting skills.
Fixing seized chocolate starts with understanding the causes. Chocolate usually seizes because of two main reasons:
- Moisture contamination
- Excessive heat exposure
Recovery Methods for Seized Chocolate
Don’t worry, seized chocolate can still be saved. Here are some ways to fix it:
- Add neutral oil or shortening gradually
- Use warm, not hot, temperatures for gentle melting
- Stir continuously during the melting process
“A few drops of oil can transform seized chocolate back to a smooth consistency.” – Chocolate Experts
Prevention Tips
To avoid seizing, use the right techniques. Moisture is the enemy of smooth melting. Make sure all tools are dry and don’t add water while melting.
Here are some prevention tips:
- Use a double boiler for controlled heating
- Keep temperatures below 120°F (49°C)
- Work in a humidity-controlled environment
- Choose high-quality chocolate with superior cocoa butter content
By learning these solutions, you’ll be ready for any melting issues. You’ll make beautiful, smooth chocolate creations.
Best Practices for Storage and Reuse
Storing melted chocolate needs careful attention to keep its quality high. Chocolatiers suggest special ways to keep melted chocolate good after it’s made.
Temperature is key when storing melted chocolate. Proper storage helps keep the chocolate smooth. The best storage temperature is between 55-68°F (13-20°C). This stops unwanted changes in texture and quality.
- Store in airtight containers
- Keep away from direct sunlight
- Avoid moisture exposure
- Use clean, dry utensils
Reusing melted chocolate is great for cooking. Dark chocolate can last up to two years. Milk and white chocolates last about one year if stored right.
| Chocolate Type | Storage Duration | Recommended Temperature |
|---|---|---|
| Dark Chocolate | Up to 2 years | 55-68°F |
| Milk Chocolate | 1-2 years | 55-68°F |
| White Chocolate | 1-2 years | 55-68°F |
Pro tip: When reheating stored chocolate, use gentle, low-heat methods. Short 15-second microwave bursts with frequent stirring keep the chocolate smooth.
The key to successful chocolate storage is controlling temperature, moisture, and exposure to external elements.
Professional Tips for Perfect Results
Getting great at melting chocolate takes skill and knowledge. Professional chocolatiers know it’s more than just melting. They use special techniques to get it right.
Melting chocolate is an art that needs focus on temperature and method. Experts share specific ways to get the perfect chocolate melt.
Precision Temperature Control
Temperature is key in melting chocolate. Here are some important temperature ranges:
- Dark chocolate: 110-120°F
- Milk chocolate: 104-115°F
- White chocolate: 104-115°F
Expert Melting Techniques
Chocolatiers use special methods for the best results:
| Technique | Key Benefit |
|---|---|
| Small Chocolate Chunks | Faster, more even melting |
| Low Heat Method | Prevents scorching |
| Interval Heating | Reduces overheating risk |
“Chocolate is about precision – one degree can make all the difference.” – Professional Chocolatier
Pro tip: Always use a candy thermometer to check chocolate temperature while melting. Keeping chocolate away from water and using top-quality chocolate are key to perfect melted chocolate.
Creative Uses for Melted Chocolate
Learning to melt chocolate opens up a world of tasty possibilities. It’s not just for baking anymore. Now, you can make amazing desserts that wow everyone.

Chocolate dipping ideas can make your desserts stand out. Here are some fun ways to use melted chocolate:
- Fruit Dipping: Make fancy chocolate-covered strawberries, bananas, and orange slices
- Dessert Drizzling: Add cool chocolate lines to cakes, ice cream, and pastries
- Homemade Truffles: Make soft chocolate treats with different fillings
- Chocolate Bark: Mix it up with nuts, dried fruits, and seeds
Professional pastry chefs say to try different chocolates for unique tastes. Dark chocolate is great for deep flavors, while milk chocolate is sweeter.
“Melted chocolate is like an artist’s paint – limitless in its creative potential!” – Pastry Chef Maria Rodriguez
Want to get better at chocolate? Here are more ideas:
- Make chocolate garnishes for desserts
- Try chocolate-dipped cookies
- Get creative with chocolate decorations
- Prepare chocolate fondue for fun
| Chocolate Type | Best Used For | Preparation Time |
|---|---|---|
| Dark Chocolate | Truffles, Bark | 15-20 minutes |
| Milk Chocolate | Fruit Dipping | 10-15 minutes |
| White Chocolate | Decorations | 10-12 minutes |
Remember, the more you practice, the better you’ll get. Start with simple ideas and work your way up to making amazing chocolate creations.
Safety Considerations and Food Handling
Chocolate melting safety is key for tasty treats and your health. Chefs and home cooks must stick to strict food safety rules. This helps avoid contamination and ensures great results.
Important safety steps for handling melted chocolate include:
- Always wash hands thoroughly before handling chocolate
- Use clean, sanitized equipment
- Check chocolate temperature to prevent burning
- Avoid introducing moisture into melting chocolate
Temperature control is vital in chocolate melting safety. Different chocolate types need unique handling:
- White chocolate burns at approximately 110°F
- Reduce microwave power to 50% to minimize overheating risks
- Stir chocolate every 20-30 seconds for even melting
“Safety is not an accident, it’s a careful process” – Culinary Safety Expert
When picking melting tools, focus on safety by:
- Using microwave-safe glass or ceramic bowls
- Avoiding metallic utensils that can cause sparking
- Choosing metal spoons that don’t retain moisture
Choosing top-notch chocolate brands like Valrhona and Callebaut is smart. They taste great and melt well, making your prep safer.
Conclusion
Mastering chocolate melting is like turning a simple kitchen task into a special adventure. It lets home cooks make desserts that look and taste like they were made by pros. The secret is to be patient, precise, and try out different ways to melt chocolate.
There are many ways to melt chocolate, like using the microwave or a double boiler. Each method has its own benefits for getting chocolate just right. It’s important to heat it in short bursts, stir often, and keep an eye on the temperature. This way, you avoid burnt chocolate and get a smooth, silky texture.
As you get better at melting chocolate, you’ll know it by heart. This guide has given you a clear plan to follow. You can make everything from creamy ganache to fancy cake decorations. Your desserts will go from good to great.
Getting better at cooking means trying new things and learning from mistakes. See each time you melt chocolate as a chance to get better. Your adventures with chocolate are just starting, and the fun is endless.