
Growing potatoes in your backyard garden is exciting and rewarding. With the right techniques, anyone can grow potatoes and enjoy a big harvest. This guide will show you how to grow these versatile tubers from seed to harvest.
Potatoes are a staple crop that’s great in many dishes. Whether you want to roast, mash, or store them, this guide has you covered. Learning the basics of potato cultivation helps you get the most from your garden.
Key Takeaways
- Learn comprehensive techniques for growing potatoes in home gardens
- Understand the importance of proper soil preparation and care
- Discover methods to prevent common potato diseases and pests
- Master harvesting and storage techniques for optimal potato quality
- Explore different potato varieties suitable for home cultivation
Understanding Different Potato Varieties
There are over 5000 potato varieties worldwide. Choosing the right type can make your garden and cooking better. Knowing what each variety offers helps you pick the best for your needs.
Potatoes vary in starch content, growth, and how they taste in the kitchen. Each variety adds something special to your meals and garden.
Russet Potatoes
Russet potatoes are great for baking, mashing, and frying. They have a thick, dark brown skin and a fluffy inside. They make perfect crispy fries and light mashed potatoes.
Yukon Gold Potatoes
Yukon Golds have a medium starch level and a buttery yellow flesh. They’re good for roasting, mashing, and creamy soups. Their flavor and texture are loved by many cooks.
Red and Fingerling Varieties
Red potatoes and fingerlings are special for different dishes. They’re low in starch and perfect for:
- Roasting whole
- Creating potato salads
- Adding to soups and stews
| Potato Variety | Starch Level | Best Uses |
|---|---|---|
| Russet | High | Baking, Frying, Mashing |
| Yukon Gold | Medium | Roasting, Mashing, Soups |
| Red Potatoes | Low | Salads, Roasting, Boiling |
Think about your garden, storage, and cooking plans when picking potatoes. Some, like ‘Sarpo Mira’, resist disease well. Others, like ‘Ratte’, are known for their taste.
Soil Requirements and Preparation
Starting a potato garden needs good soil preparation. This step is key to a successful harvest. The right soil helps potatoes grow strong and produce lots of tubers.
Potatoes do best in well-drained, sandy loam soil with lots of organic matter. The perfect spot for growing potatoes has the right mix of soil factors.
Key Soil Characteristics
- pH Level: 5.8 to 6.5 (slightly acidic)
- Texture: Sandy loam with good drainage
- Organic Matter: High percentage of decomposed materials
- Nutrient Profile: Rich in phosphorus and potassium
To prepare soil for potatoes, start by testing its pH and nutrients. Use organic amendments like compost or well-rotted manure to adjust the soil. Stay away from fresh manure, as it can harm the soil and plants.
“The secret to potato success lies beneath the surface – in the quality of your soil preparation.”
| Soil Preparation Step | Recommended Action |
|---|---|
| Soil Testing | Conduct pH and nutrient analysis |
| Organic Amendment | Add aged compost, reduce fresh manure |
| Drainage Improvement | Add sand or organic matter to enhance drainage |
| Soil Temperature | Ensure soil reaches 60-70°F before planting |
Rotating crops is important for soil health. Don’t plant potatoes in the same spot every year. This helps keep the soil rich and prevents diseases. By following these steps, gardeners can make a great place for potatoes to grow.
Essential Tools and Materials for Potato Growing
To grow potatoes well, you need the right tools and supplies. Good equipment helps you get a big harvest and makes growing easier.
Every gardener should have a good set of tools. The right tools help keep plants healthy and increase your yield.
Garden Tools for Potato Cultivation
- Sharp spade or garden fork for digging
- Hoe for creating trenches and hilling
- Hand trowel for precise planting
- Pruning shears for plant maintenance
- Wheelbarrow for soil and compost transportation
Essential Soil Amendments
| Amendment Type | Benefits | Recommended Quantity |
|---|---|---|
| Compost | Improves soil structure | 2-3 inches per planting area |
| Aged Manure | Adds nutrients | 1-2 inches mixed into soil |
| Bone Meal | Provides phosphorus | 1 cup per 10 square feet |
Storage and Harvesting Equipment
Keeping potatoes fresh after harvest is key. Use breathable containers, paper bags, or potato storage boxes to keep them fresh.
“The right tools transform potato gardening from a chore to a rewarding experience.” – Gardening Expert
Choosing the right tools and supplies is crucial for a good potato season. Focus on quality equipment for each step of growing potatoes.
How to Grow Potatoes: Step-by-Step Process
Growing potatoes needs careful planning and attention. Start by picking high-quality seed potatoes and getting them ready for growth. Each stage of potato cultivation is crucial for a good harvest.
“Success in potato growing is about understanding each stage of the planting process” – Experienced Gardener
Here’s a detailed guide to growing potatoes:
- Seed Potato Preparation
- Choose certified seed potatoes
- Allow seed potatoes to sprout for 1 week
- Cut potatoes into 2-inch pieces with 1-2 sprouts
- Let cut pieces dry for 2-3 days
- Soil and Planting Preparation
- Choose a sunny location with 6-8 hours of direct sunlight
- Maintain soil pH between 5.8 and 6.5
- Ensure soil temperature is 45-50°F
- Plant seed potatoes 12-15 inches apart
- Planting Technique
- Dig 4-inch deep holes
- Space rows 3 feet apart
- Place seed potatoes with sprouts facing upward
- Cover with soil
After planting, keep your potatoes watered. Water them 1-2 inches per week, adjusting for your area’s weather. When plants are 8-12 inches tall, start adding soil around them. This protects the tubers and helps them grow.
Be patient with your potatoes. They take 70 to 160 days to mature. Early varieties grow faster, while late ones yield more but take longer.
Selecting and Preparing Seed Potatoes
Growing great potatoes starts with picking and getting ready the right seed potatoes. It’s key to choose high-quality seed potatoes for a good harvest. Look for certified disease-free seed potatoes from trusted sources to help your plants grow well.
Cutting Seed Potatoes Effectively
Getting your seed potatoes ready means cutting them right. Here’s how to do it well:
- Use only large, healthy seed potatoes
- Cut potatoes into 2-inch squares
- Ensure each piece has at least one viable “eye” or sprout
- Aim for pieces weighing approximately 2 ounces
Curing Cut Potato Pieces
Curing is a key step in getting seed potatoes ready. It stops rot and helps them grow strong:
- Allow cut pieces to dry for 1-2 days
- Maintain humidity around 85 percent
- Keep temperature between 60-65 degrees Fahrenheit
- Allow a protective callus to form over cut surfaces
Timing Your Potato Planting
When to plant is just as important as how to plant. Think about these points:
| Planting Consideration | Recommended Guideline |
|---|---|
| Soil Temperature | Minimum 45°F |
| Planting Window | 2-4 weeks before last frost |
| Latest Planting Date | June 15th (depending on location) |
“Success in potato gardening begins with careful seed potato preparation and thoughtful planting strategy.” – Agricultural Experts
Pro tip: One pound of seed potatoes usually gives you about 10 pounds of potatoes. So, picking and preparing them well is key for a good potato garden.
Proper Planting Techniques and Spacing
Planting potatoes right is key. You need to know the exact spacing and depth. This ensures your potatoes grow well and your garden thrives.
Spacing is vital for potato plants to grow well. Follow these guidelines to create the best conditions for your potatoes.
Potato Spacing Recommendations
- Large potato varieties: Plant 12-15 inches apart
- Smaller varieties: Space 8-12 inches between plants
- Row spacing: Maintain 24-36 inches between rows
How far apart you plant potatoes affects their growth. Too close and they fight for food and get sick easier.
Planting Depth and Technique
- Dig trenches 6-8 inches deep
- Plant seed potatoes 3-4 inches underground
- Ensure soil temperature is between 59°F and 68°F
| Potato Variety | Spacing | Planting Depth |
|---|---|---|
| Russet | 15 inches | 4 inches |
| Yukon Gold | 8-12 inches | 3-4 inches |
| Fingerling | 10 inches | 3 inches |
“Proper potato spacing is the secret to a bountiful harvest.” – Garden Experts
Square-foot gardening is another way to grow potatoes. You can plant:
- 1 potato per square for large storage potatoes
- 2 potatoes per square for mid-sized results
- 4 potatoes per square for small “new potatoes”
Pro tip: Always use certified seed potatoes and ensure they have multiple sprouts for best results.
Watering Requirements and Irrigation Methods
Watering potatoes is key to growing them well. It helps plants grow strong and produce more. Potatoes need the right amount of water at different times.
Knowing how much water potatoes need can really help your crop. They usually need about 1 to 2 inches of water during the growing season.
Moisture Management Strategies
Managing moisture well is important. Here are some tips:
- Keep the soil moist but not too wet
- Don’t let the soil dry out completely
- Water regularly to keep the soil consistent
Optimal Watering Schedule
Setting up a good watering schedule takes watching and adjusting. Here are some important tips:
| Growth Stage | Watering Frequency | Water Amount |
|---|---|---|
| Early Growth | Moderate | 1 inch per week |
| Tuber Bulking | Increased | 1.5-2 inches per week |
| Pre-Harvest | Reduced | Minimal watering |
“Water is the lifeblood of potato cultivation, but precision is key.” – Agricultural Expert
Using drip irrigation can save up to 50% of water. It waters the roots directly, cutting down on waste and boosting efficiency.
But, too much water can harm potatoes just like too little. Look for signs of stress like wilting or color changes. Then, adjust your watering plan.
Fertilizing Your Potato Plants
Fertilizing potatoes needs a careful plan to get the best tubers. The right nutrients can greatly improve your harvest’s quality and amount.
Knowing when to fertilize is key. At the start of tuber growth (30-40 days after planting), potatoes need more phosphorus and potassium.
“Successful potato cultivation is about precision in nutrition, not just volume.”
Good fertilizer mixes for potatoes usually have certain ratios:
- 5-10-10 fertilizer blend
- 8-24-24 nutrient composition
- Low nitrogen options
Too much fertilizer can harm your plants. Look out for:
- Yellowing of lower leaves
- White mineral crust on soil surface
- Excessive foliage growth
Here are expert tips for fertilizing potatoes:
- Test your soil before fertilizing
- Try organic fertilizers like bone meal
- Use water-soluble fertilizers every month
- Focus on phosphate and potassium nutrients
Pro tip: Consistent watering during tuber formation enhances nutrient absorption and overall plant health.
If you’ve over-fertilized, stop adding nutrients right away. Then, wash the soil to get rid of extra minerals. Balanced nutrition is essential for strong potato plant growth and a big harvest.
Hilling Techniques for Better Yields
Potato hilling is a key technique for a better potato harvest. It involves piling soil around the plants to protect the tubers and boost crop yield.

Hilling potatoes has many benefits. It keeps tubers from getting sunlight, which can cause solanine, a harmful chemical. This method helps protect the potatoes and increases the yield.
When to Start Hilling
Knowing when to hill potatoes is important. Start when the plants are 6 to 8 inches tall. This usually happens 2-3 weeks after they grow out of the soil.
- Start hilling when plants are 6-8 inches tall
- Repeat hilling every 2-3 weeks during the growing season
- Continue until plants begin to flower
Proper Hilling Methods
Effective hilling needs a careful approach. Gently pile soil around the plants, making small hills that cover about one-third of the plant’s height.
“Proper hilling can increase potato yields by creating more space for tuber development and protecting plants from adverse conditions.”
| Hilling Technique | Benefits |
|---|---|
| Soil Mounding | Protects tubers from sunlight |
| Regular Intervals | Encourages additional tuber formation |
| Depth Management | Prevents solanine development |
Experts suggest using a specialized hilling tool for even mounds. The aim is to create loose, well-aerated soil for tuber growth.
Pro tip: Keep the soil moist during hilling to help the potatoes grow well.
Common Potato Diseases and Prevention
Potato diseases can ruin your crop if not stopped. Knowing the common potato diseases and how to prevent them is key. Farmers and gardeners must watch over their potato plants to avoid problems.
Potato scab is a big problem for potato quality. The bacterium Streptomyces scabies can be found in many soils. It causes rough patches on potato skins, especially on thin-skinned varieties.
- Key prevention strategies for potato diseases include:
- Maintaining optimal soil pH (around 5.5-6.0)
- Using certified, disease-free seed potatoes
- Practicing crop rotation
- Ensuring proper soil drainage
Late Blight is another big threat to potatoes. It can destroy a whole crop in days, causing dark spots on leaves. This disease can stay in the soil for years, so prevention is key.
“Prevention is always better than cure when it comes to potato diseases.” – Agricultural Experts
Viral diseases like Potato Virus Y (PVY) can also harm crops. These viruses, spread by aphids, can make plants produce less. To prevent diseases, a mix of strategies is needed.
- Effective potato disease prevention techniques:
- Regular crop monitoring
- Removing infected plants immediately
- Using resistant potato varieties
- Maintaining proper soil conditions
Using integrated pest management can cut disease by up to 60%. By knowing what causes potato diseases and taking action early, gardeners can keep their crops healthy. This way, they can enjoy a good harvest.
Managing Potato Pests and Infestations
Potato pests can ruin your crop if not stopped. It’s key to know and control these pests to keep your potato garden healthy. Different insects can harm potato plants, risking your harvest.
Managing pests well needs a mix of prevention, watching, and specific actions. Growers must stay alert and act fast to spot and fix infestations.
Colorado Potato Beetle Control
The Colorado potato beetle is a big problem for potatoes. These beetles have black and yellow stripes and can grow up to 9/16 inch long. They are a big threat to potato crops.
- Manually remove beetles and larvae from plants
- Use row covers to prevent beetle access
- Apply organic insecticides like neem oil
- Rotate crops to disrupt beetle lifecycle
Wireworm Management
Wireworms are long, soil-dwelling larvae that harm potato tubers. They can grow up to 1 inch long and make holes in potatoes. This reduces quality and yield.
- Use crop rotation strategies
- Implement soil treatments before planting
- Choose resistant potato varieties
- Maintain proper soil drainage
Natural Pest Solutions
Integrated pest management uses green ways to fight potato pests. Natural methods help cut down on chemicals and protect your potatoes.
- Encourage beneficial insects like ladybugs
- Plant companion crops that repel pests
- Use biological control agents
- Maintain healthy soil conditions
“Prevention is always better than cure when managing potato pests.” – Agricultural Expert
By using these methods, gardeners can keep potato pests under control. This protects their potato plants from harm.
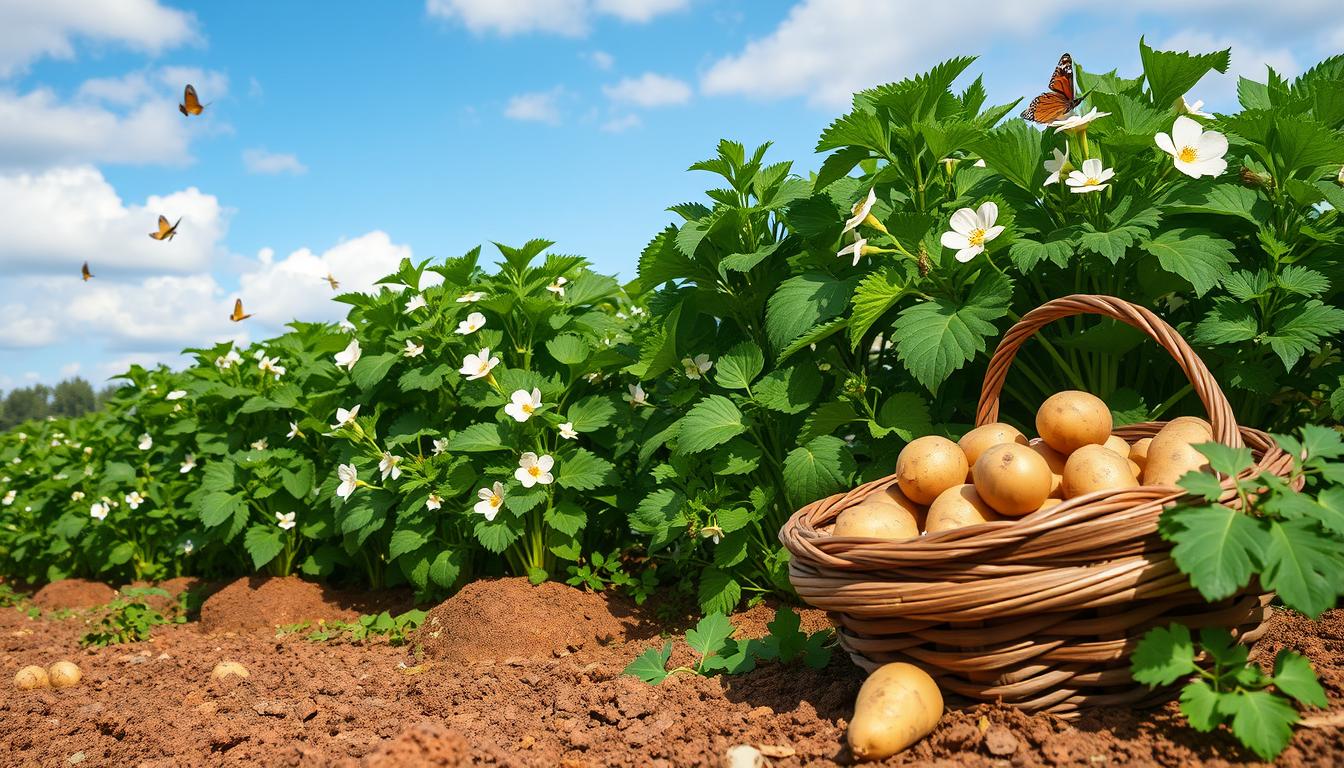
When and How to Harvest Potatoes

Knowing when to harvest potatoes is key to getting the best crop. Harvesting them right is important for quality and yield. It’s all about timing and technique.
Different potatoes have their own harvest times. New potatoes are ready 2-3 weeks after the plants stop flowering. Storage potatoes are ready 2-3 weeks after the leaves turn yellow and die. Most potatoes take 90 to 120 days to mature.
“The secret to perfect potato harvesting is understanding your crop’s lifecycle and reading the plant’s signals.”
Here are signs your potatoes are ready:
- Foliage turning yellow and dying back
- Potato tubers reaching 1.5 inches in diameter
- Vines becoming brown and crisp
Here’s how to harvest potatoes:
- Stop watering plants 2-3 weeks before harvest
- Use a garden fork to gently dig around potato plants
- Carefully lift tubers from 4-6 inches below ground
- Avoid damaging potatoes during excavation
After harvesting, cure potatoes in a shaded area at 50-60°F with 85-90% humidity for two weeks. This heals cuts and prepares them for storage. Store them at 38-40°F to keep them fresh for months.
Pro tip: Potatoes in containers might be ready sooner because of warmer soil. Always check your specific potato variety’s recommended harvest time.
Post-Harvest Handling and Storage
Starting potato storage right after harvest is key. Proper handling is vital for keeping potatoes fresh longer. It’s important to focus on a few main points to keep their taste and nutrients.
The curing process is very important. After picking, potatoes need 7 to 10 days in a dark, well-ventilated spot. Good curing helps potatoes develop a protective layer. This layer stops moisture loss and prevents decay.
- Cure potatoes at temperatures between 45°F and 60°F
- Maintain humidity levels of 85-90%
- Ensure good air circulation during curing
- Avoid direct contact between potatoes to prevent spoilage
Keeping the right storage temperature is crucial. The best temperature for storing potatoes is around 40-46 degrees Fahrenheit. If it’s too cold, potatoes can get too sweet. If it’s too warm, they might sprout and rot.
Proper storage can extend potato shelf life from several weeks to several months, depending on the variety and conditions.
Not all potatoes store the same way. Late-season potatoes typically store better than early varieties. Some can last up to 7-8 months if stored right. Russet potatoes, with their thick skin, usually keep longer than thin-skinned ones.
It’s important to check on your potatoes often. Look for sprouts, rot, or dryness. If you see any bad spots, take out those potatoes. This helps keep the rest fresh.
Tips for Growing Potatoes in Containers
Container potato growing is a great option for those with little space. It works well for small balconies or urban gardens. It’s a fun and productive way to garden.
To grow potatoes in containers, you need to plan carefully. The right containers and understanding their needs are key to success.
Choosing the Right Container
When picking containers for potatoes, keep these points in mind:
- Minimum container size: 10 to 15 gallons
- Container depth: 2 to 3 feet
- Multiple drainage holes essential
- Material options: fabric grow bags, large pots, wooden crates
Growing Medium Requirements
The soil mix is vital for growing potatoes in containers. It should have:
- Excellent drainage
- Rich organic content
- Balanced nutrient composition
- Soil pH between 5.2 to 6.0
“A well-prepared container with the right soil can transform your potato growing experience.” – Gardening Expert
Potatoes need about 3 gallons of space per plant. Mix potting soil, compost, and sand for the best soil. Make sure your container gets 6-8 hours of sunlight and stays moist.
Pro tip: Choose determinate potato varieties like Yukon Gold or Red Pontiac for best container growing results.
Conclusion
Growing potatoes at home brings many benefits. It’s not just about making food. It’s about enjoying fresh, tasty produce and feeling proud of your harvest.
By using what you’ve learned, you can make your garden great for growing potatoes. You can use raised beds, containers, or traditional plots. Knowing how to care for potatoes means you’ll get a lot of them.
Pay attention to the soil, water, and pests to grow tasty potatoes. Your gardening journey will give you healthy food and a sense of accomplishment. Keep learning, try new things, and enjoy the fruits of your labor.
By following these tips, you’ll see that potato gardening is more than a hobby. It’s a way to learn about food and enjoy fresh produce from your garden.